Globus
Contents
Globus#
Author: Fu Yin
Update: Dec 18, 2022
Reading: 30 min
Introduction#
Globus is a secure, reliable research data management service. It works as a bridge between the remote endpoint and the local endpoint, and it’s a better alternative tool for rsync.
What is the Globus?
With Globus, subscribers can move, share, publish & discover data via a single interface, whether your files live on a supercomputer, lab cluster, tape archive, public cloud or your laptop, you can manage this data from anywhere, using your existing identities, via just a web browser.
Create Account#
Create Globus ID#
Globus needs to know your identity.
Signing in with your
GoogleorORCiD IDcredentials, or if yourOrganizationhas been set up with Globus, showing in Fig. 25.Otherwise, create and sign into Globus using a
Globus IDPS: if you are a student in Joanthan’s group, just email Rice IT team to add
condofrom jonathan’s storage into yourcollection.
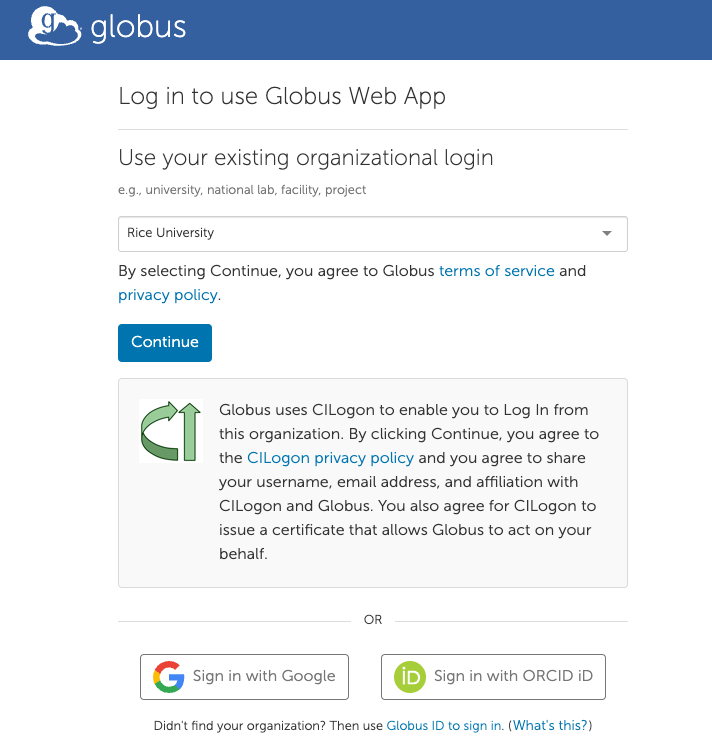
Fig. 25 Globus Login with Google or ORCiD ID#
Download Globus Connect Personal for Mac#
Most users might try to transfer data between cluster's endpoint and personal PC's endpoint, so users need to create new personal endpoint which can be refered to the
tutorial.
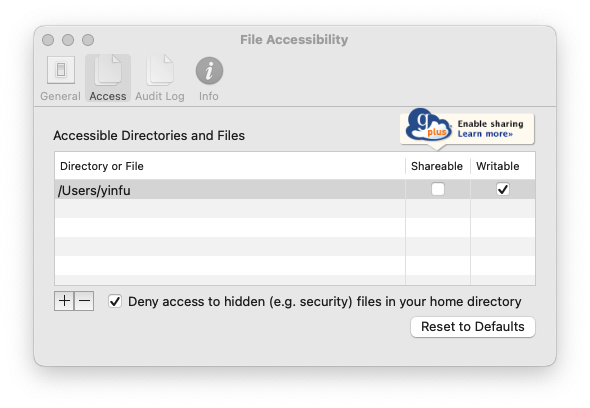
Fig. 26 Globus Personal App#
Transfer Data#
1. WebApp#
After logging in globus, you will get a webpage like Fig. 27, which is called as
Globus Web App.You can add different
collectionand mark them inBOOKMARKS, and choose the two panel mode for your two endpoints to transfer data between two PCs.After globus submits your work, you can find the mission process in
ACTIVITYpart.
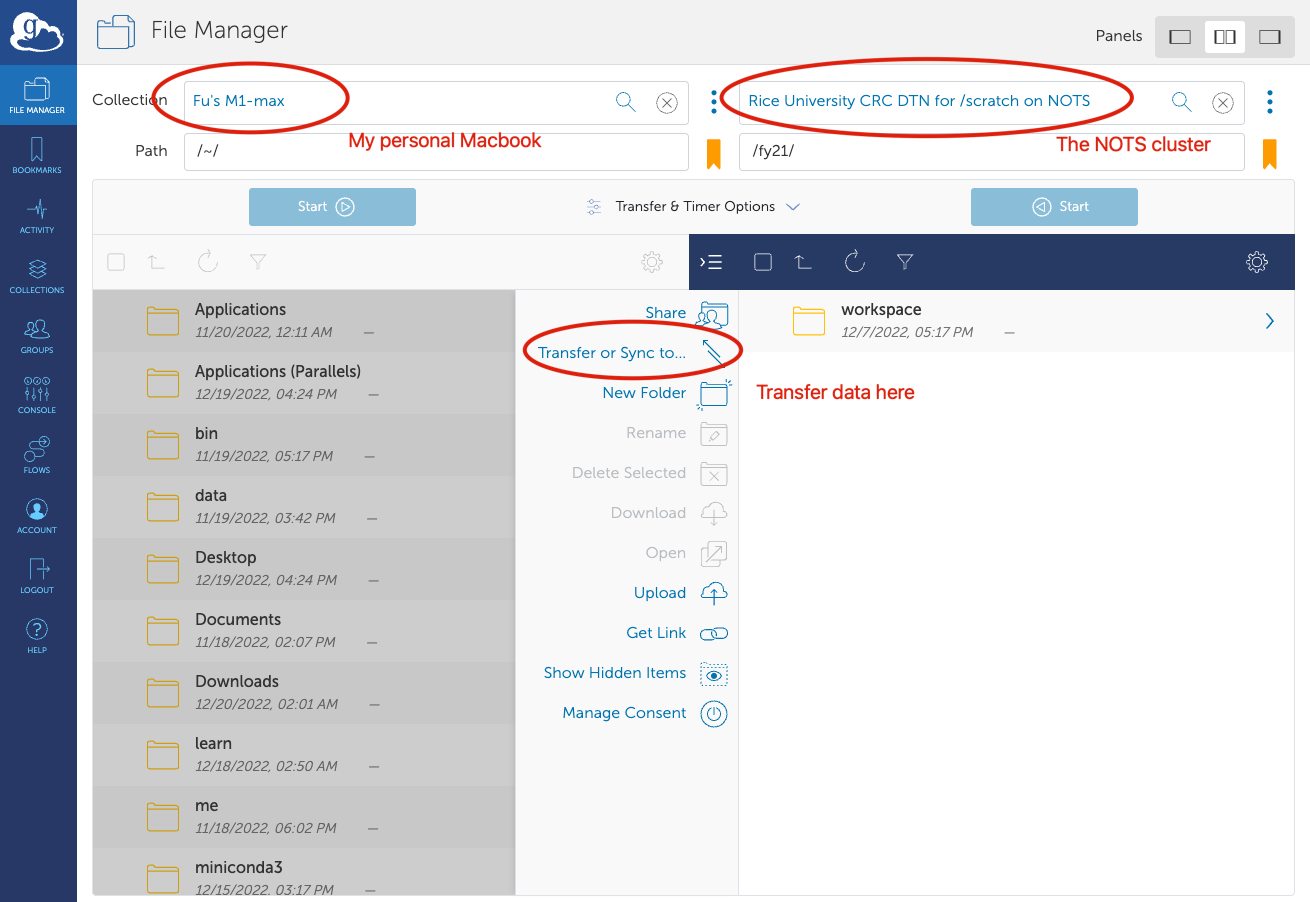
Fig. 27 Globus Web App#
2. Globus-Cli#
Sometimes you may have a lot of files (not a single file) to transfer, you need to write a script to do this work. globus-cli provides a command-line-shell tool to transfer data, and install it following the open source code in github:
pip install globus-cli
Login:
When you login successfully, it will generate a file in
.globus/cli/storage.db, which will remember your login info, avoiding the repeated login actions next time.
globus login
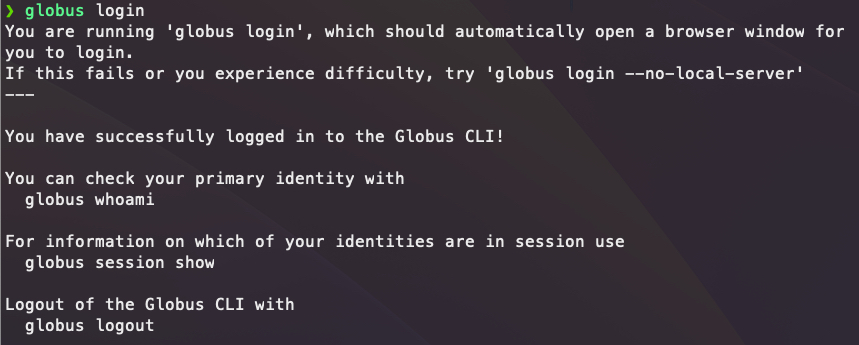
Fig. 28 Globus Login in Terminal#
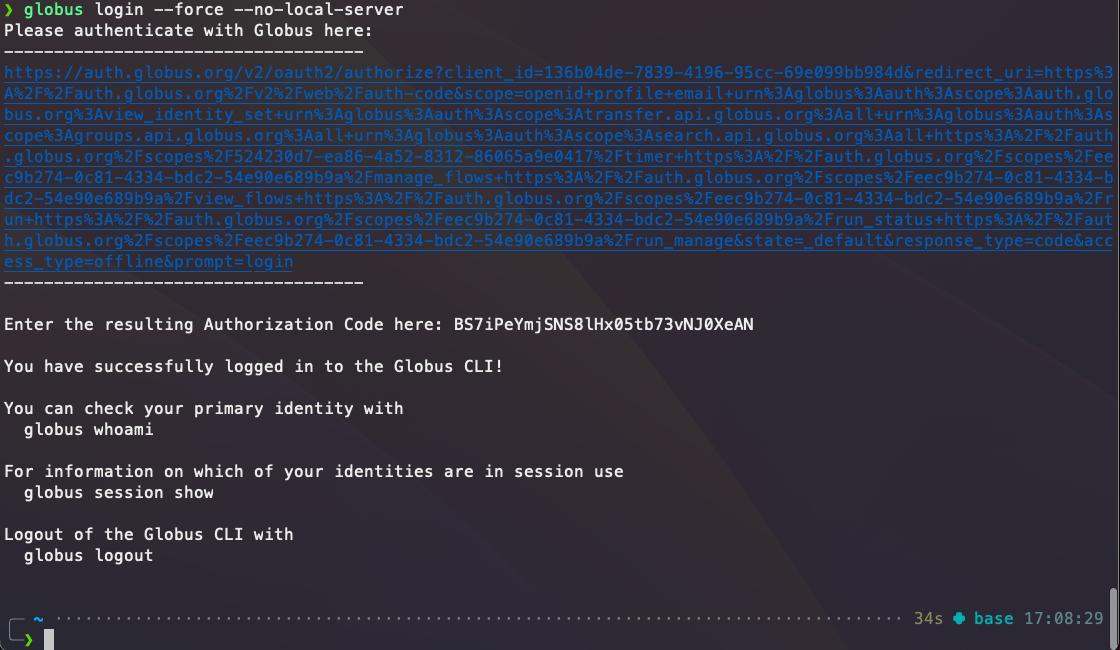
Fig. 29 Globus Login in Terminal with Authorization Code#
Endpoint ID:
Approach-1: get Endpoint ID via
globus-cli, takeFu's M1-maxfor example which is my personal endpoint name:
# get endpoint
globus endpoint search "Fu's M1-max"

# copy and paste the desired Endpoint ID from the search results
ep1=f34fbbd4-6708-11ed-8422-xxxxxxxxxx

# now we can use the endpoint in a human readable fashion
globus endpoint show $ep1
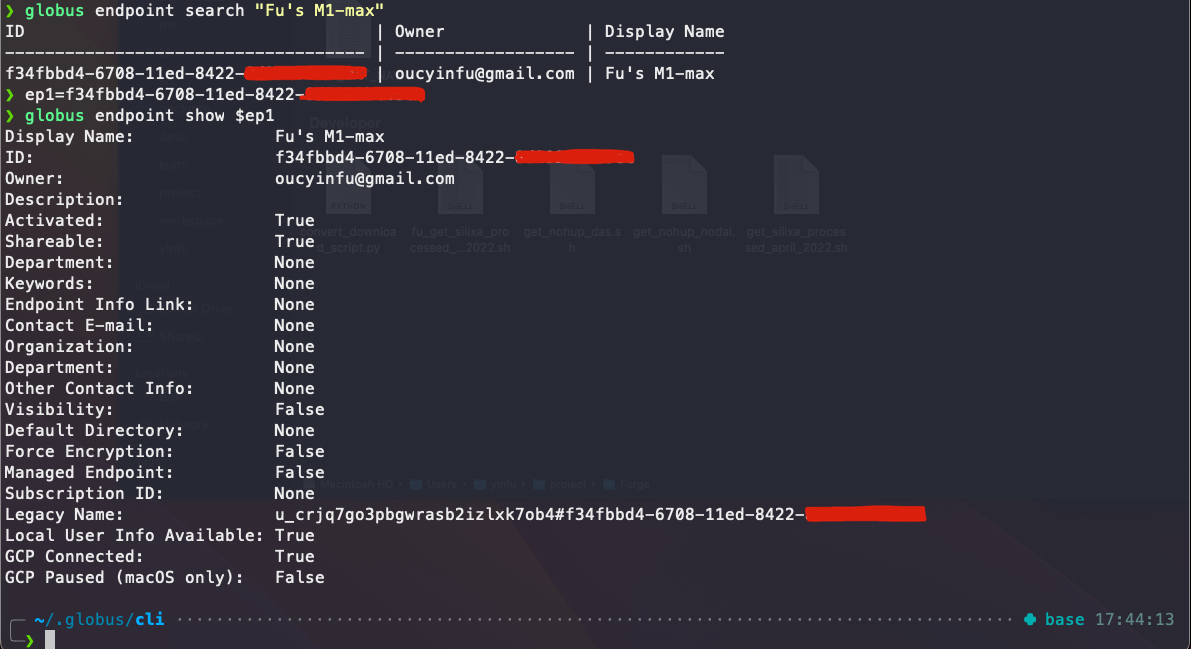
Fig. 30 Globus M1-max Endpoint ID#
Approach-2: get Endpoint ID via
Globus Web App, click the specified collections to show detailed info, then theUUIDis the Endpoint ID:
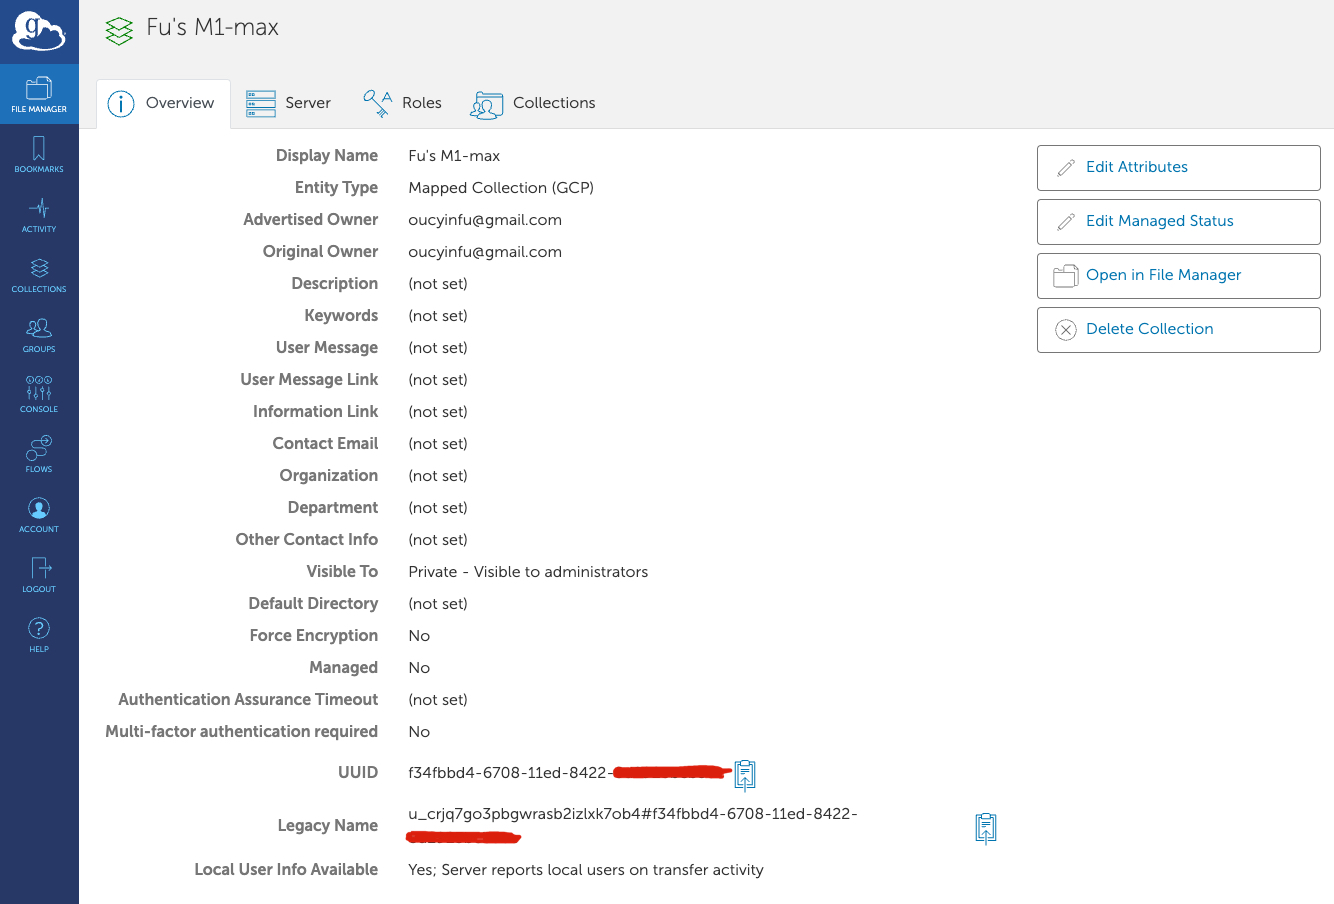
Fig. 31 Globus M1-max Endpoint ID in Globus Web App#
Filesystem Operations
Demonstrates the synchronous commands of
mkdir,rename, andls.
# Tutorial Endpoint ID found from 'globus endpoint search Tutorial'
$ ep1=ddb59aef-6d04-11e5-ba46-22000b92c6ec

# Make a new directory
$ globus mkdir $ep1:\~/cli_example_dir
The directory was created successfully

# Rename the directory
$ globus rename $ep1:\~/cli_example_dir $ep1:\~/cli_example_dir_renamed
File or directory renamed successfully

# Show the directory contents after the changes
# (assuming ~/ was empty before these commands)
$ globus ls $ep1:\~/
cli_example_dir_renamed/
Single Item Transfers
Submits transfer requests for a file and a directory from one Globus Tutorial Endpoint to another
# Tutorial Endpoint IDs found from 'globus endpoint search Tutorial'
$ ep1=ddb59aef-6d04-11e5-ba46-22000b92c6ec
$ ep2=ddb59af0-6d04-11e5-ba46-22000b92c6ec

# transfer file1.txt from one endpoint to another
$ globus transfer $ep1:/share/godata/file1.txt $ep2:\~/file1.txt --label "CLI single file"
Message: The transfer has been accepted and a task has been created and queued for execution
Task ID: 466a5962-dda0-11e6-9d11-22000a1e3b52

# recursively transfer the godata folder from one endpoint to another
$ globus transfer $ep1:/share/godata $ep2:~/godata --recursive --label "CLI single folder"
Message: The transfer has been accepted and a task has been created and queued for execution
Task ID: 47477b62-dda0-11e6-9d11-22000a1e3b52
Batch Transfers
Uses a
input.txtfile to request multiple files in one transfer request.
# this is the contents of in.txt:
# a list of source paths followed by destination paths

file1.txt file1.txt
file2.txt file2.txt # inline-comments are also allowed
file3.txt file3.txt
Use
--batchoninput.txt
# Tutorial Endpoint IDs found from 'globus endpoint search Tutorial'
$ ep1=ddb59aef-6d04-11e5-ba46-22000b92c6ec
$ ep2=ddb59af0-6d04-11e5-ba46-22000b92c6ec

# pass `--batch` mode an input .txt file
# all paths from stdin are relative to the paths supplied here
$ globus transfer $ep1:/share/godata/ $ep2:~/ --label "CLI Batch" --batch input.txt
Message: The transfer has been accepted and a task has been created and queued for execution
Task ID: 306900e0-dda1-11e6-9d11-22000a1e3b52
Only One Task?
Note that only one task was needed even though there are multiple files to be transferred.
3. Globus-Sdk#
This SDK provides a convenient Pythonic interface to Globus web APIs, including the Transfer API and the Globus Auth API (tools for authenticating logins). Documentation for the APIs is available at https://docs.globus.org/api/, install it firstly:
pip install globus-sdk
There are some app-examples using the python SDK, https://github.com/globus/native-app-examples. But it is hard to use, and I recommend to use globus-cli to transfer data.
4. Python Script#
Here is an example using globus-cli to transfer data (single file and directory) between two endpoints, and note the input.txt file has two columns, the first column is source file's path and the second column is destination file's path.
import os

input_txt = "input.txt"
label = "CLI batch single file and directory"
source_endpoint_id = "xxxx-xxxx..."  # jonathan's condo
dest_endpoint_id = "xxxx-xxxx..."  # nots's scratch

### single_file
a1 = "/hpc-demo/docs/getbatchError.m" # source file's path
a2 = "/fy21/hpc-demo/docs/getbatchError.m" # destination file's path
### directory
b1 = "/hpc-demo/docs"
b2 = "/fy21/hpc-demo/docs_new"

fout = open(input_txt, 'w')
fout.write('# [source_file_path]\t[dest_file_path]\n')
fout.write(a1)
fout.write('\t')
fout.write(a2)
fout.write('\n')
fout.write(b1)
fout.write('\t')
fout.write(b2)
fout.write('\t --recursive') # these are recursive transfers in the batch
fout.write('\n')
fout.close()

command = "globus transfer %s %s --label '%s' --batch %s" % (source_endpoint_id, dest_endpoint_id, label, input_txt)
os.system(command)
The input.txt file is showing below:
# [source_file_path]	[dest_file_path]
/hpc-demo/docs/getbatchError.m	/fy21/hpc-demo/docs/getbatchError.m
/hpc-demo/docs	/fy21/hpc-demo/docs_new	 --recursive